Tag Archives: decorating

Vanity

Standard

Remember my sneak peek post here?  Well, I’m proud to announce my vanity is ALMOST completely finished!  Unfortunately the drawer pulls have an odd measurement so I had to order them online, but I couldn’t wait any longer to share these pictures with you!  Matt and I also picked up some fun finds at a local antique store today during our search for drawer pulls… a slight distraction but I’m thankful that he enjoys going to antique stores as much as I do.  Ok, I can’t stand the excitement any longer- let’s get to the pictures!

This is Matt’s desk before…

Here is my vanity after (so far)!

Working on this transformation was a learning process for me, but I’m very happy with the (somewhat) finished product.  The mirror was a Salvation Army find for less than $10- LOVE IT!

I continue to emphasize the vanity is not yet complete because it does not have hardware.  This is also why most of the drawers are slightly open in the above pictures.  Otherwise I may not be able to open them again!

Besides the lack of hardware, it’s done.  I even put in shelf paper and transferred all of my beauty supplies to my vanity so I can start using it right away!  A DIY shelf paper tip: use wrapping paper instead.  For some of the drawers, I used red and white wrapping paper and put
double-sided tape down to keep them secure.

I also purchased a roll of fabric shelf protector.  I love how cheery it is!

 I hope my drawer pulls get shipped soon so I can share the REALLY finished product with you.  Oh, and see that wooden chair?  Don’t think I do not have big plans for that too!

As for the antique store finds we brought home today, take a look!

It’s a chalkboard- how fun is that?!  We also picked up this item to store our keys…

Let me know what you think!  I love catching up with you!

GOD BLESS!!

Orange You Glad You Stopped By Today…?!

Standard

Why hello!  I’m so glad you stopped by today because I’m excited to share with you our most recent paint addition to our back entry.  You can see my last post about my “environmental sculpture” here.  Talk about DIY and inexpensive decor- I literally cut this branch off a tree in our backyard and spray painted it silver.  Most people think it’s a sculpture until I tell them what it truly is.  Fun!

Here is the back entry before:

Pretty boring, right?  Behold the difference a few coats of paint can make!

Yes, we still have our Christmas tree up- don’t judge.  The back entryway, like the rest of the house, is still a work in progress but it’s getting there.   I don’t think I would be ambitious enough to paint a larger room this burnt orange color, but in a small space I really like it!

What do you think?

Now that the holidays and New Year are behind us, I hope you are still able to honor any resolutions or goals you established for yourself.  I have started a prayer journal, which is something I’ve always wanted to do.  Although our days get busy and chaotic, it’s important to focus on the One who makes it all possible.  He is so good.  He is enough.

GOD BLESS!!

A Funky Staircase

Standard

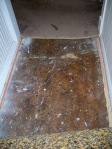
One of my favorite features of our home is the two staircases.  I love that it has a front and back staircase – more modern homes just do not have them anymore.  When we moved in, almost our entire home was covered with old carpet.  When we pulled up the carpet there were several surprises- some good, some not so good.  For example, we discovered beautiful hardwood floors under the carpet in the living room and dining room.  However, under the carpet in the upstairs hallway we discovered this:

Believe it or not, the hallway still looks like this, but we’ll get to it… eventually.

My favorite under-the-carpet discovery was our back staircase.  Here’s Matt after pulling up the carpet:

Yes, the staircase resembles a rainbow.  I have been attempting to research the time period when this may have been painted, but I’m not having much luck.  I will keep researching it, however.  If anyone has any knowledge of staircase painting time periods, please share it with me!  Matt and I both decided we want to attempt to restore this staircase to its full multi-colored glory.

Here’s my progress so far:

After priming the staircase

The tops of the stairs were painted black

All painted!

I used sample sizes for the colored side of each stair.  There is still a lot of paint remaining as well for touch-ups throughout the years.  This staircase is off of the kitchen, and it makes for a great surprise!  Guests always comment on it!  So fun!

GOD BLESS!!

Magazine Christmas Trees

Standard

As I’ve stated before, I love DIY projects for Christmas gifts.  In addition to gifts, I enjoy DIY projects for holiday decorating as well.  I’ve been meaning to fill you in on one of my favorite DIY Christmas projects for a while, and I’ve finally had time to do so!  This project is SUPER easy and the Christmas trees look great!  I have about 7 of them throughout my house.  The best part?  They’re made from magazines.  Whether you use thick magazines (think “O” magazine), or catalogs you get in the mail, these Christmas trees make for fun, funky holiday decor!

Step 1: Break the spine of the magazine.  You want it to be flexible.

Step 2: With the magazine facing you, fold the page from the top right corner.  Begin by folding the front cover.  

Continuing folding each page until the entire magazine is folded 

Step 3: Beginning with the lower right point of the triangle you’ve created, fold each page of the magazine a second time.  The pages will look diamond-shaped.  

This is how the magazine will look after step 3:

It will be fairly thick

Step 4: There will be a small triangle at the bottom.  Fold the triangle and tuck it into the folded paper above.  This will transform your diamond into a triangle.   

This is how your magazine will look after step 4:

TA-DAH! Your magazine Christmas tree is complete!  While no tape is necessary, I tape the front cover and the back cover (not to each other, separately).  They tend to want to come undone because of the thickness of the cover paper.  From here you can leave your tree as is, or you can decorate it accordingly.  Here are some trees from my house decorated in various ways.  The possibilities are truly endless!

This tree was sprayed with adhesive, then sprinkled with glitter

The front 2 trees were spray painted with different metal tones

As a centerpiece for a gathering

I hope this has been helpful to you.  I have enjoyed making these Christmas trees for years and they are always a fun conversation piece.  These also store fairly well, so at the end of the season you can just fold them down and put them away until next year!

GOD BLESS!!

Some Updates…

Standard

I don’t know about you, but this time of year for me is BUSY BUSY BUSY!  In the midst of the chaos, I want to take some time to share some updates with you.

Matt and I hosted our first Christmas party over the weekend and it was a BLAST!  In fact, I was too busy having fun to take any pictures.  I’m bummed I don’t have any photographic proof of the great time we had, but you’ll have to take my word for it!  Following the Christmas party on Saturday, we went  to the Detroit Lions game on Sunday.  Tickets to the game were Matt’s anniversary present from me.  The first year anniversary “theme” is paper, so tickets seemed very fitting for my sports fanatic!

Here we are in the parking lot  of Ford Field enjoying some mimosas and bloody mary’s!

Here is our view of the field from our seats

I’ve also been doing some more decorating with our guest bedroom.  Here are some pictures of my progress.

It’s still not completely done, but it’s definitely getting there!  This bedroom definitely has a cozy, vintage feel.  The headboard is an antique store find.  As you can see, it’s an old window.  I then had Matt hang it above the bed and VOILA!  A beautiful, vintage headboard!

 In some other good news, I just found out yesterday that I’m going to be an Aunt AGAIN!!! Love to Kayla and Adam and your new bundle of joy!

GOD BLESS!

Guest Bedroom (part 2)

Standard

Hello all!  Since we’ve talked last, I’ve finished my painting project.  I hope you enjoy it!  As you can see, the paint is the only thing completed, but I will be sure to keep you updated (again) when the room is complete!

one wall done!

all done!


So now that you’ve seen the painted bedroom, I want to show you a new decorative piece I’m playing with.  My inspiration is to bring some natural elements to the interior of our home.  So… here it is!

 I shouldn’t even call it a decorative piece, seeing as how I literally cut it off one of our trees in the backyard, then spray painted it silver.  The wall the branch is hung on is still white, so it may be difficult to visualize the finished product.  I’m thinking I would like to paint this accent wall a burnt orange, like this:

Can you picture it? 

Coming up soon- our funky staircase! I can’t wait for you to see it!

What house projects are you working on?

Guest Bedroom (part 1)

Standard
I hope you are having a great start to your week.  Things have been very busy for me lately, and work continues at the house!  My most recent project is working on one of our guest bedrooms.  This is the bedroom where my mother-in-law, as well as other guests stay when they are in town.  With the holidays fast approaching, I have been working to make this room feel more cozy and warm for our guests.  It’s not complete yet, but here are some pictures of my progress so far!
This is the paint color I purchased for the walls.  Matt is not a fan, but I am in love with grey!

I love this color of grey- classic and chic!

Here you can see the walls of the bedroom BEFORE (I also use this bedroom as my reading area, as you can see)…

painting….

more painting….

I know those aren’t many pictures, but there will be more to come shortly!  I am having so much fun seeing this room become a more welcoming space.  It’s nice to see our house transform into a home.  We are hosting our first annual Christmas party in December so we have some motivation to keep working!

I will keep you posted as the bedroom continues to take shape.

God bless!